User Management
Who gets to do what is decided here. A role set up wrong can mean a technician can't close their own job, or a regular staff member can delete data that should have been protected.
Overview
User Management allows administrators to create, modify, and manage user accounts, assign roles, set permissions, and maintain organizational structure within True Tracker.
Accessing User Management
- Sign in with administrator privileges
- Navigate to Settings → User
Note: this menu item only appears for users with the Admin role — other roles, including Head, don't see it at all.
User List Screen
The User List is your main hub for viewing and managing all users in your True Tracker system. This screen displays all user accounts in an organized table format.
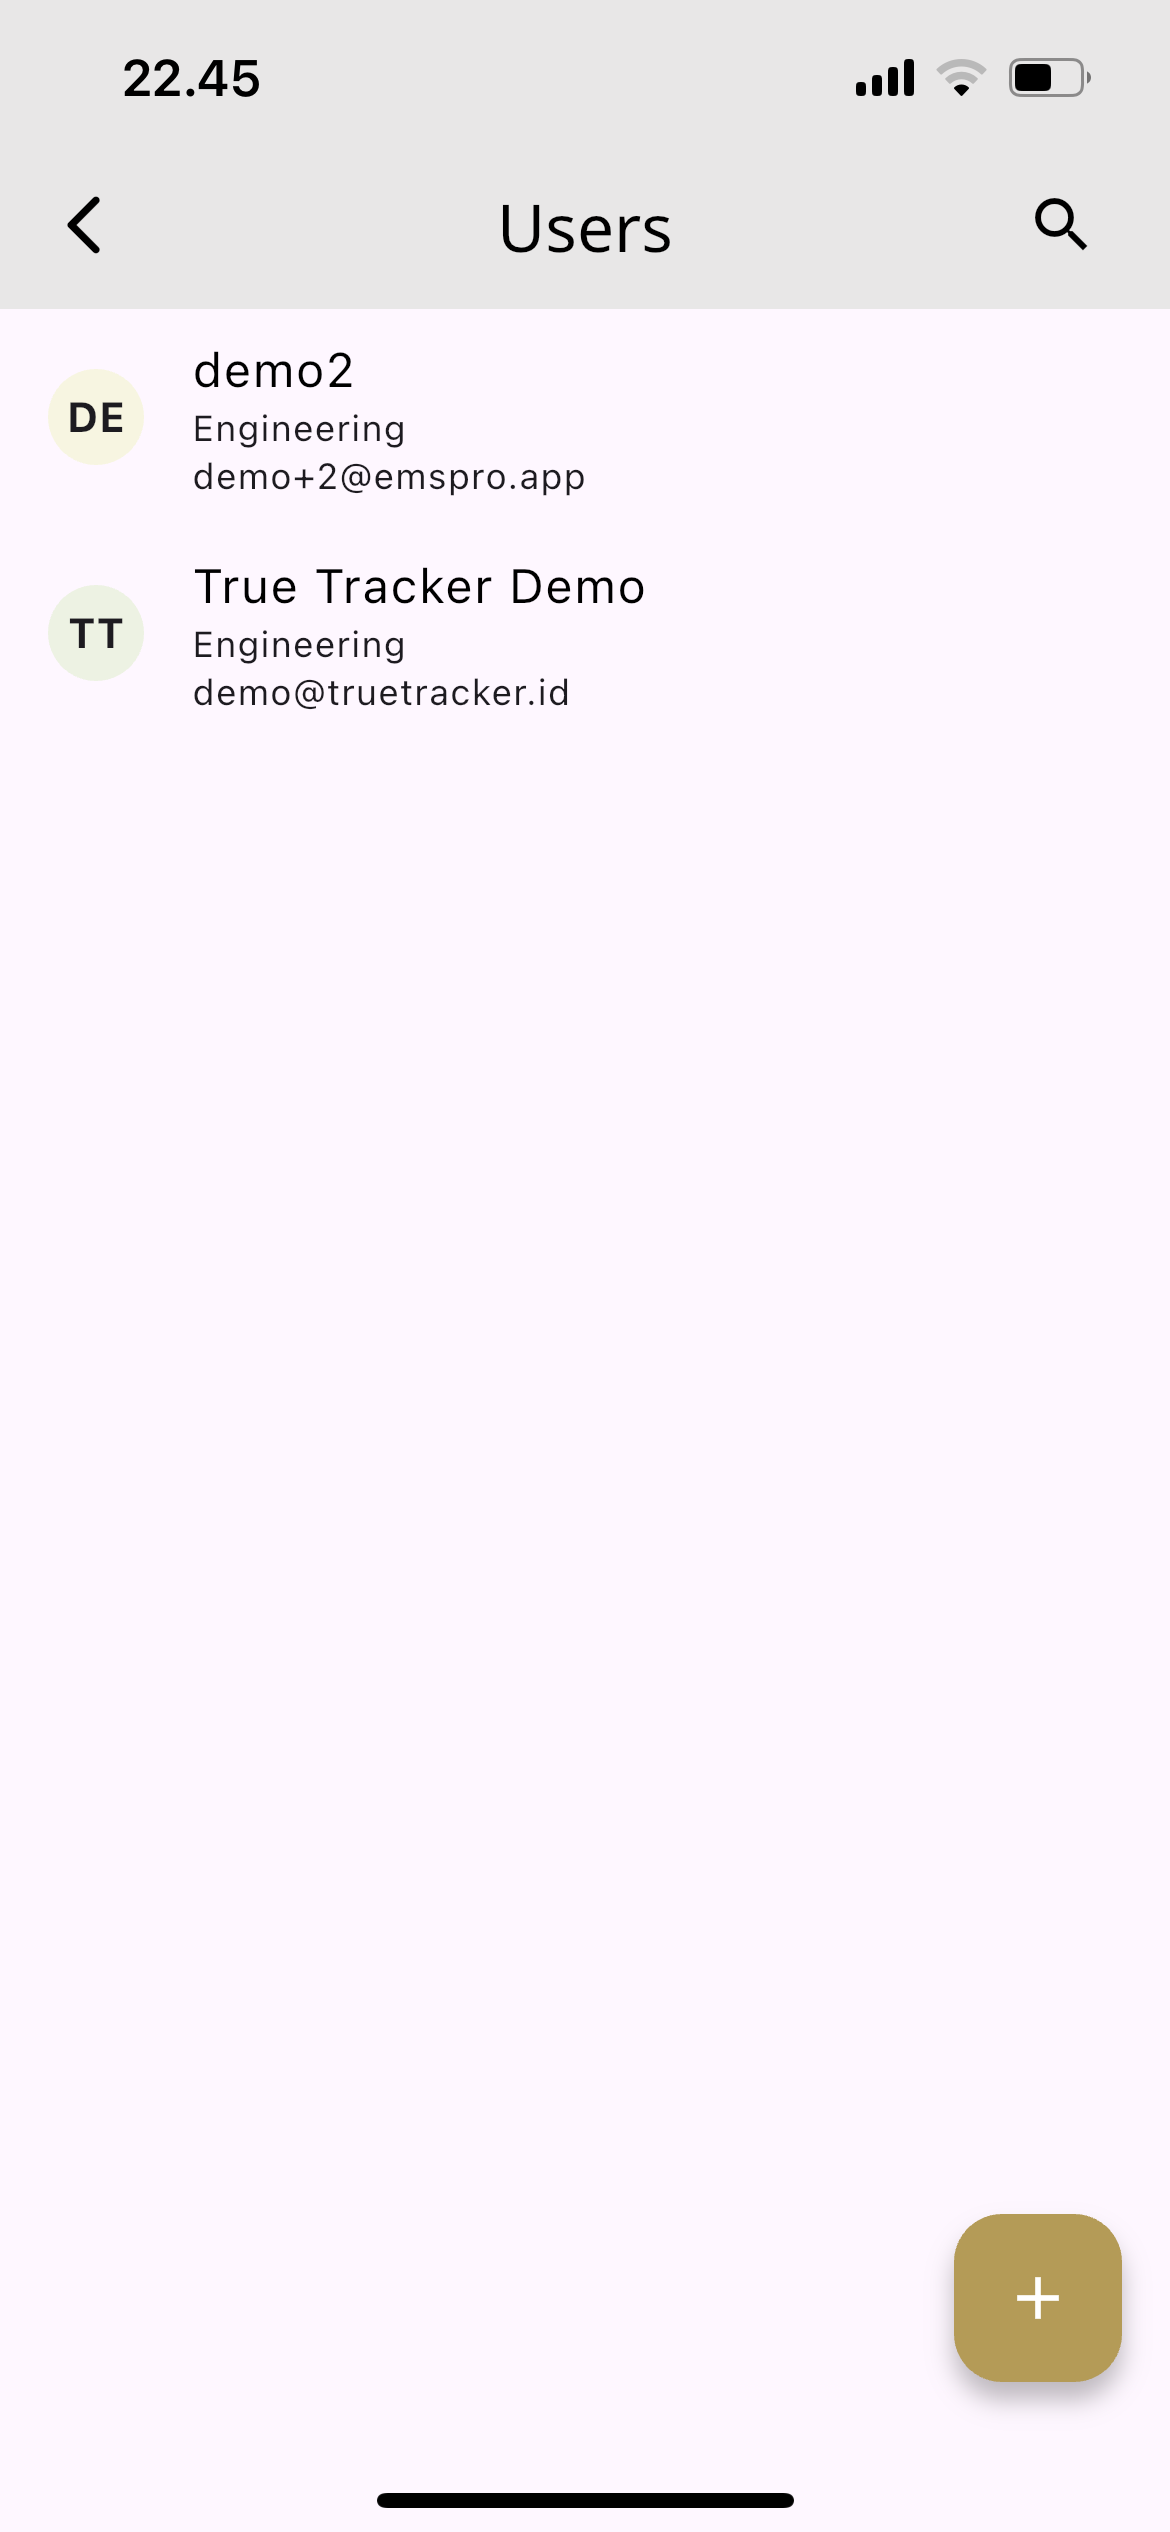
The User Management screen showing the list of all users with their details and management options.
What You'll See
| Column | Description | Example |
|---|---|---|
| Profile Picture | User's avatar or default icon | Small circular image |
| Name | Full name of the user | "True Tracker Demo" |
| User's email address (login credential) | "demo@truetracker.id" | |
| Department | Which department the user belongs to | "Engineering" |
| Roles | User's assigned roles in the system | "admin, staff" |
| Active | Shows if the user account is currently active | ✓ (checkmark) or ✗ |
Search and Filter Options
Find By Name
- Use the search box to quickly find users by typing their name
- Search results update as you type
- Case-insensitive search
Sort Options
- Click the sort dropdown (e.g., "SORT BY CREATED AT : ASC") to change sorting
- Sort by: Name or Created At
- Sort type: ASC (ascending) or DESC (descending)
- Default sorting is by Created At in ascending order
Available Actions
For Each User:
- EDIT - Modify user details, roles, and permissions
- DELETE - Remove user from the system (use with caution)
Main Actions:
- ADD USER - Create a new user account
How to Use the User List
- View All Users: The screen automatically displays all users when you access it
- Search for Specific Users: Type in the "Find By Name" box to locate users quickly
- Sort the List: Click the sort dropdown to organize users by different criteria
- Manage Individual Users: Use the EDIT or DELETE buttons for each user
- Add New Users: Click the "ADD USER" button to create new accounts
- Navigate Pages: Use the pagination controls at the bottom if you have many users
User Status Indicators
- ✓ Active: User can log in and access the system
- ✗ Inactive: User account is disabled
User Roles and Permissions
System Roles
Admin
- Full system access and configuration
- User management and role assignment
- System settings and management
Head
- Department management and oversight
- Work order approval and assignment
- Team management and reporting
Staff
- Work order execution and tracking
- Basic system access
- Mobile app access
Create User
The Create User form allows you to add new users to your True Tracker system. Click the ADD USER button from the User List to open this form.
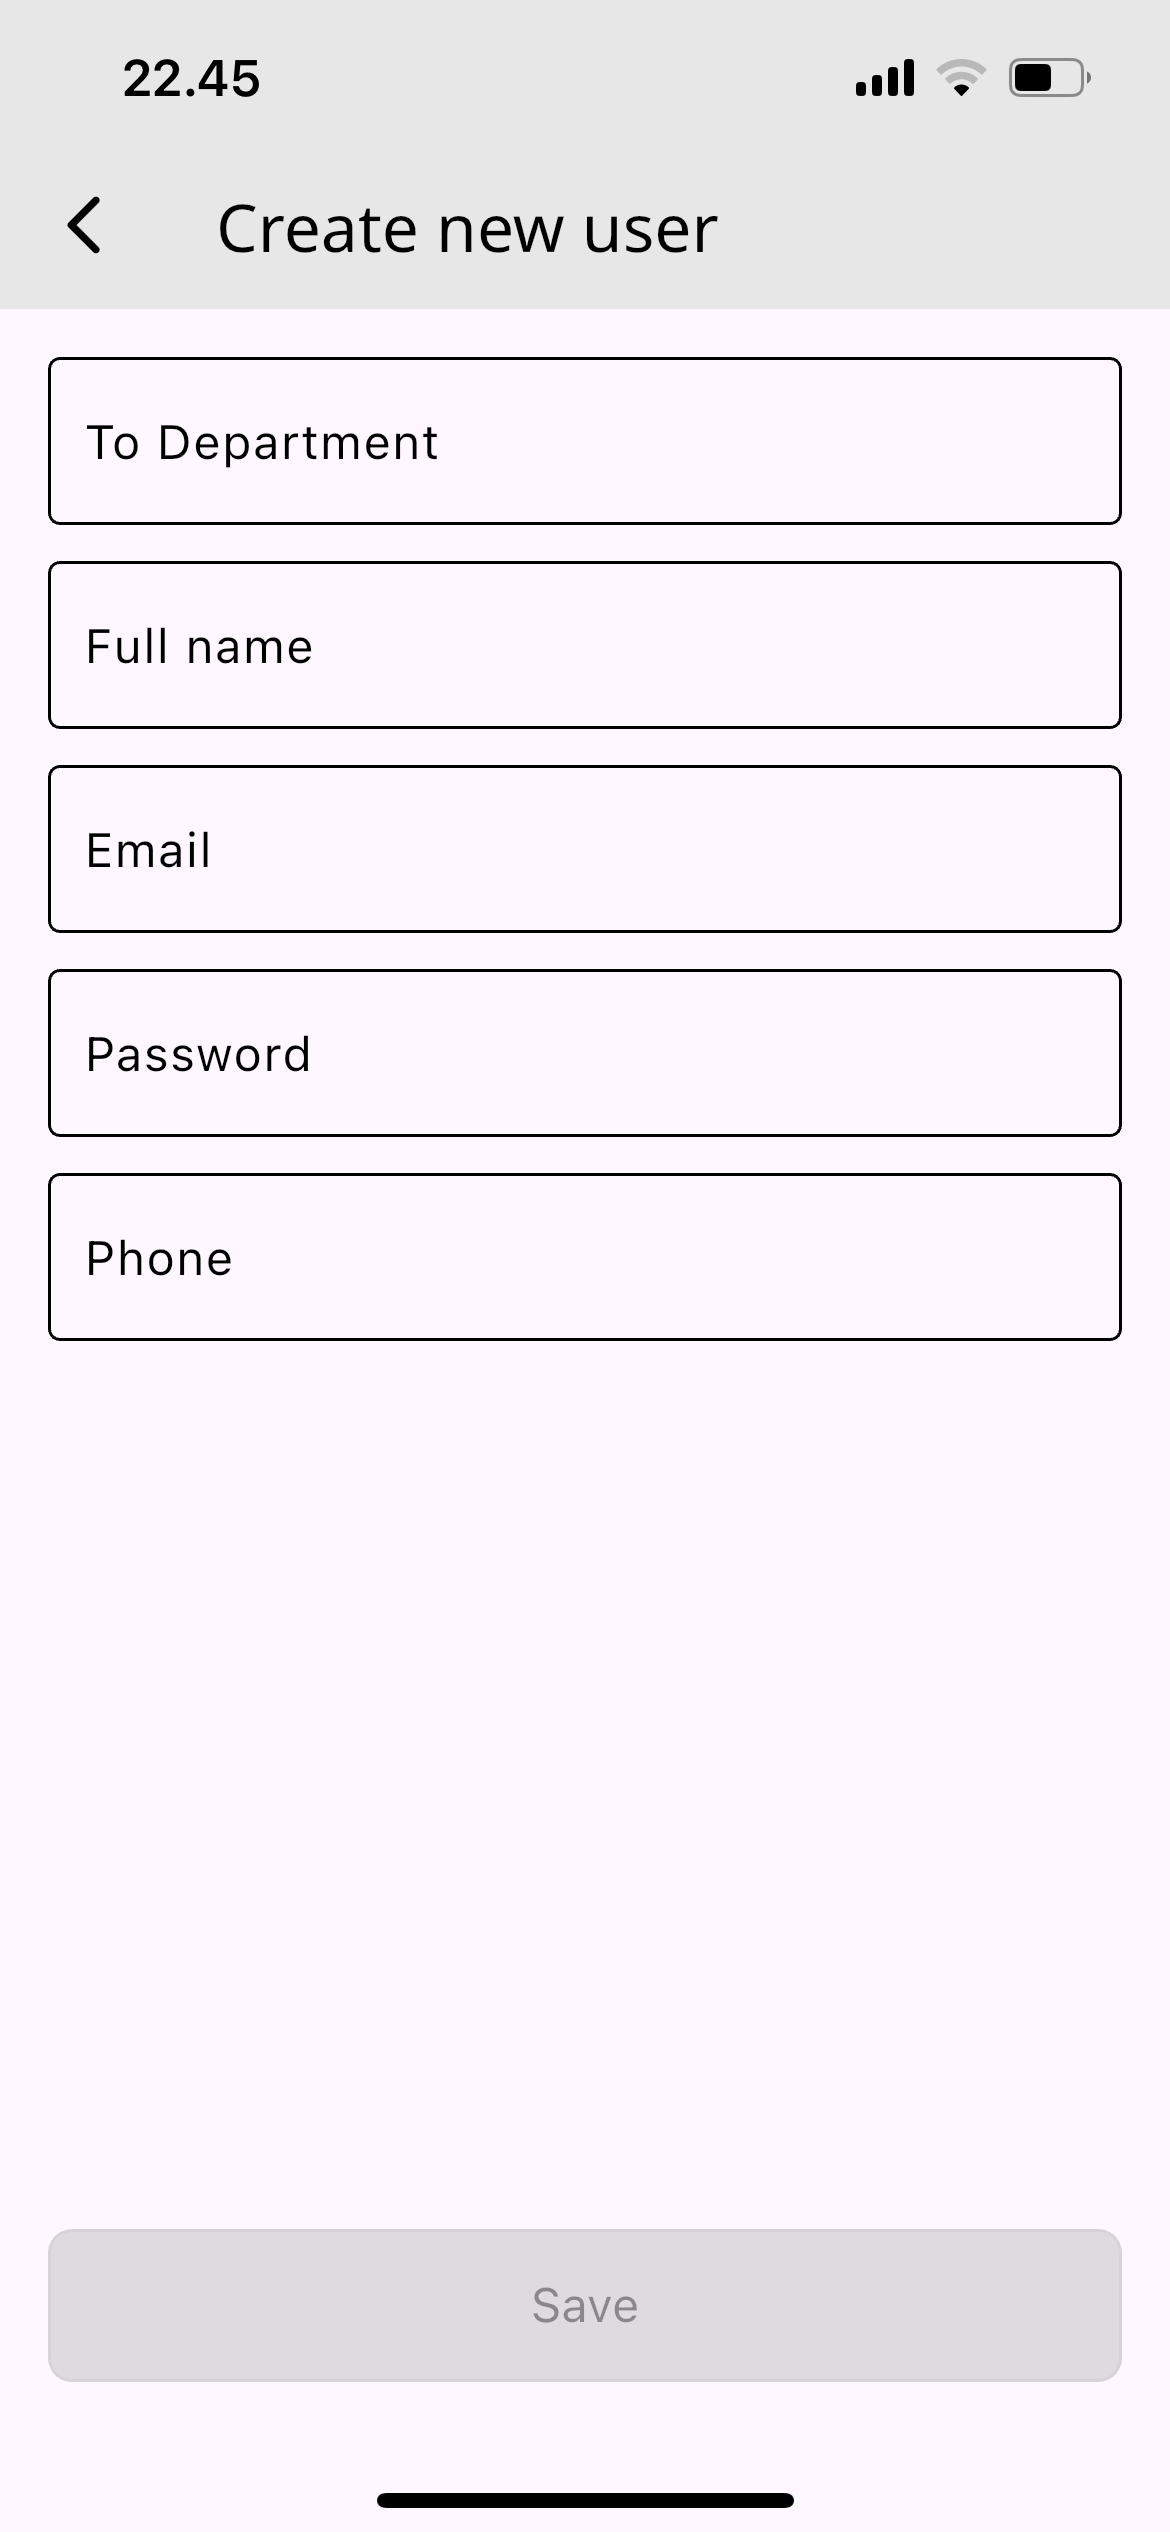
The Create User form showing the fields for adding a new user.
Form Fields
| Field | Description | Required | Example |
|---|---|---|---|
| Name | Full name of the user | Yes | "John Smith" |
| Email address (used for login) | Yes | "john.smith@company.com" | |
| Phone Number | User's contact phone number | Yes | "+62 812 3456 7890" |
| Password | User login password (minimum 6 characters) | Yes | "password123" |
| Department | Select user's department | Yes | "Engineering" |
| Role | Assign user role/permissions | Yes | "admin", "head", or "staff" |
| Upload Photo | User profile picture | No | Upload image file |
Form Actions
- Save - Creates the new user account
- Cancel - Returns to User List without saving
How to Create a User
- Click ADD USER from the User List screen
- Fill in all required fields:
- Enter the user's full name
- Provide a valid email address
- Select their department from dropdown
- Choose appropriate role
- Click Save to create the user
- You'll return to the User List and the new user appears in the list
View User
Click on any user in the list to view their detailed information.
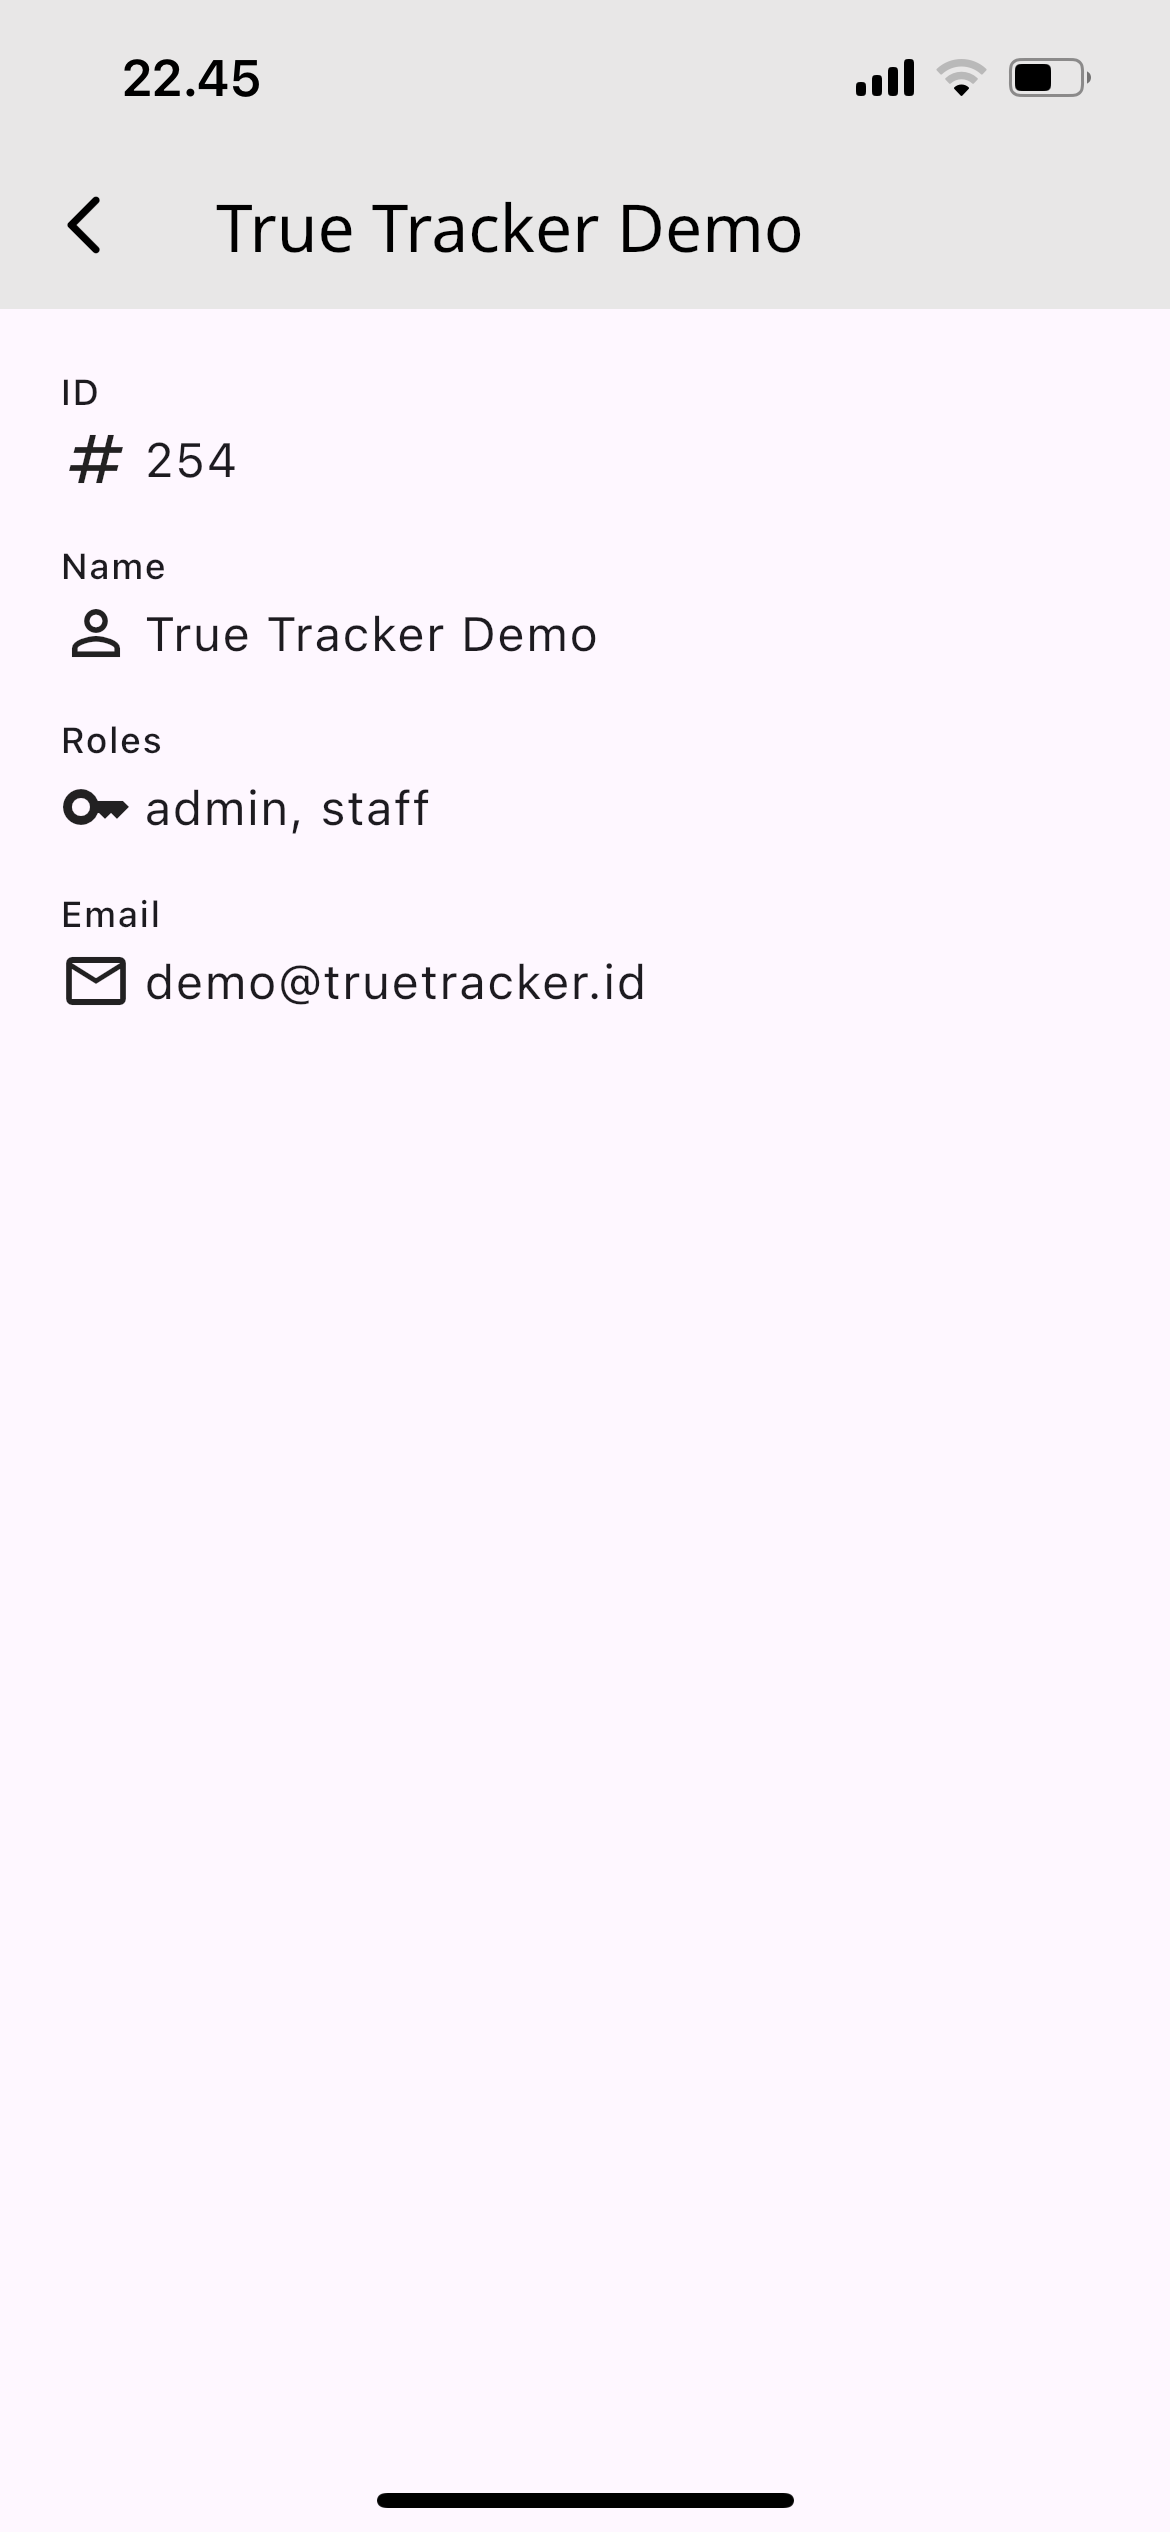
The User Detail screen showing comprehensive user information and profile details.
User Information Displayed
- Profile Picture: User's avatar or default icon
- Full Name: Complete name of the user
- Email Address: Login credential and contact email
- Phone Number: Contact phone number
- Department: User's assigned department
- Role: Current role and permissions
- Account Status: Active or inactive status
- Creation Date: When the account was created
Edit User
Click the EDIT button next to any user in the list to modify their information. The edit form contains the same fields as the create form.
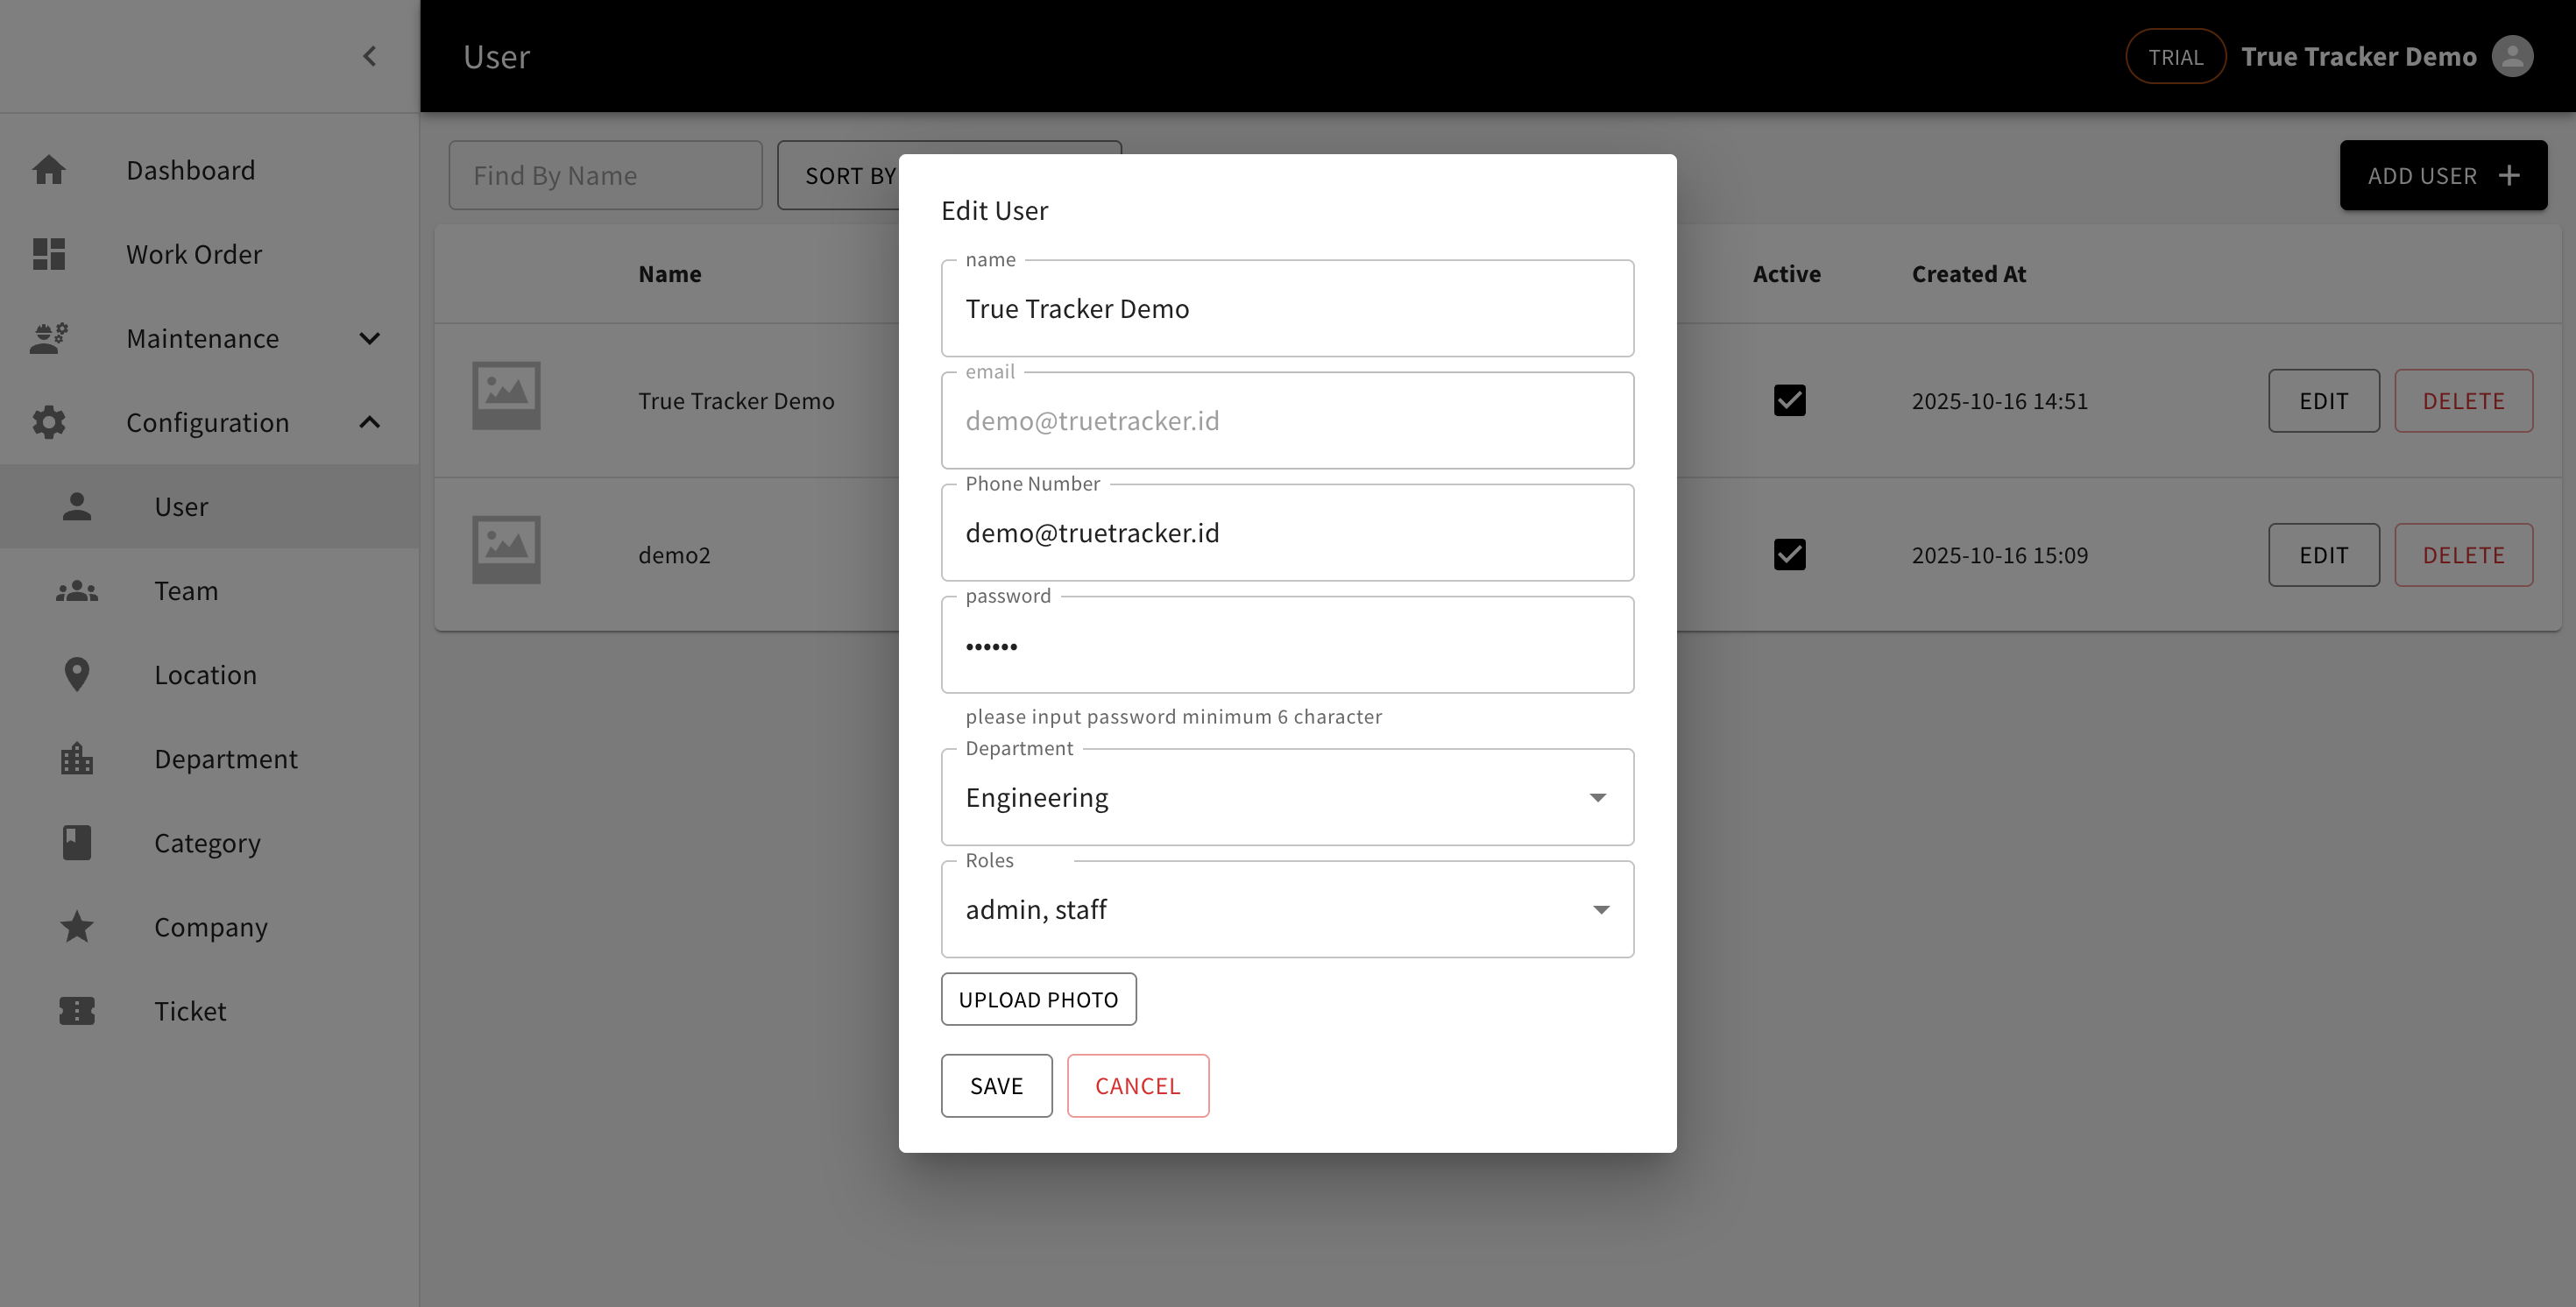
The Edit User form showing the fields for modifying user information.
How to Edit a User
- Find the user in the list
- Click the EDIT button
- Modify the necessary fields
- Click Save to update the user